


Living in Australia, long haul flights are just one of the things I’ve had to get used to. So when I visited family in Europe last month, 8 planes, 4 countries and 28 days later, my body was feeling pretty crooked.
Luckily for me, yoga is always to the rescue, and I don’t travel without my Spiritual Gangster yoga gear essentials, such as a good pair of pants, bra, and my favourite Bowern yoga mat.
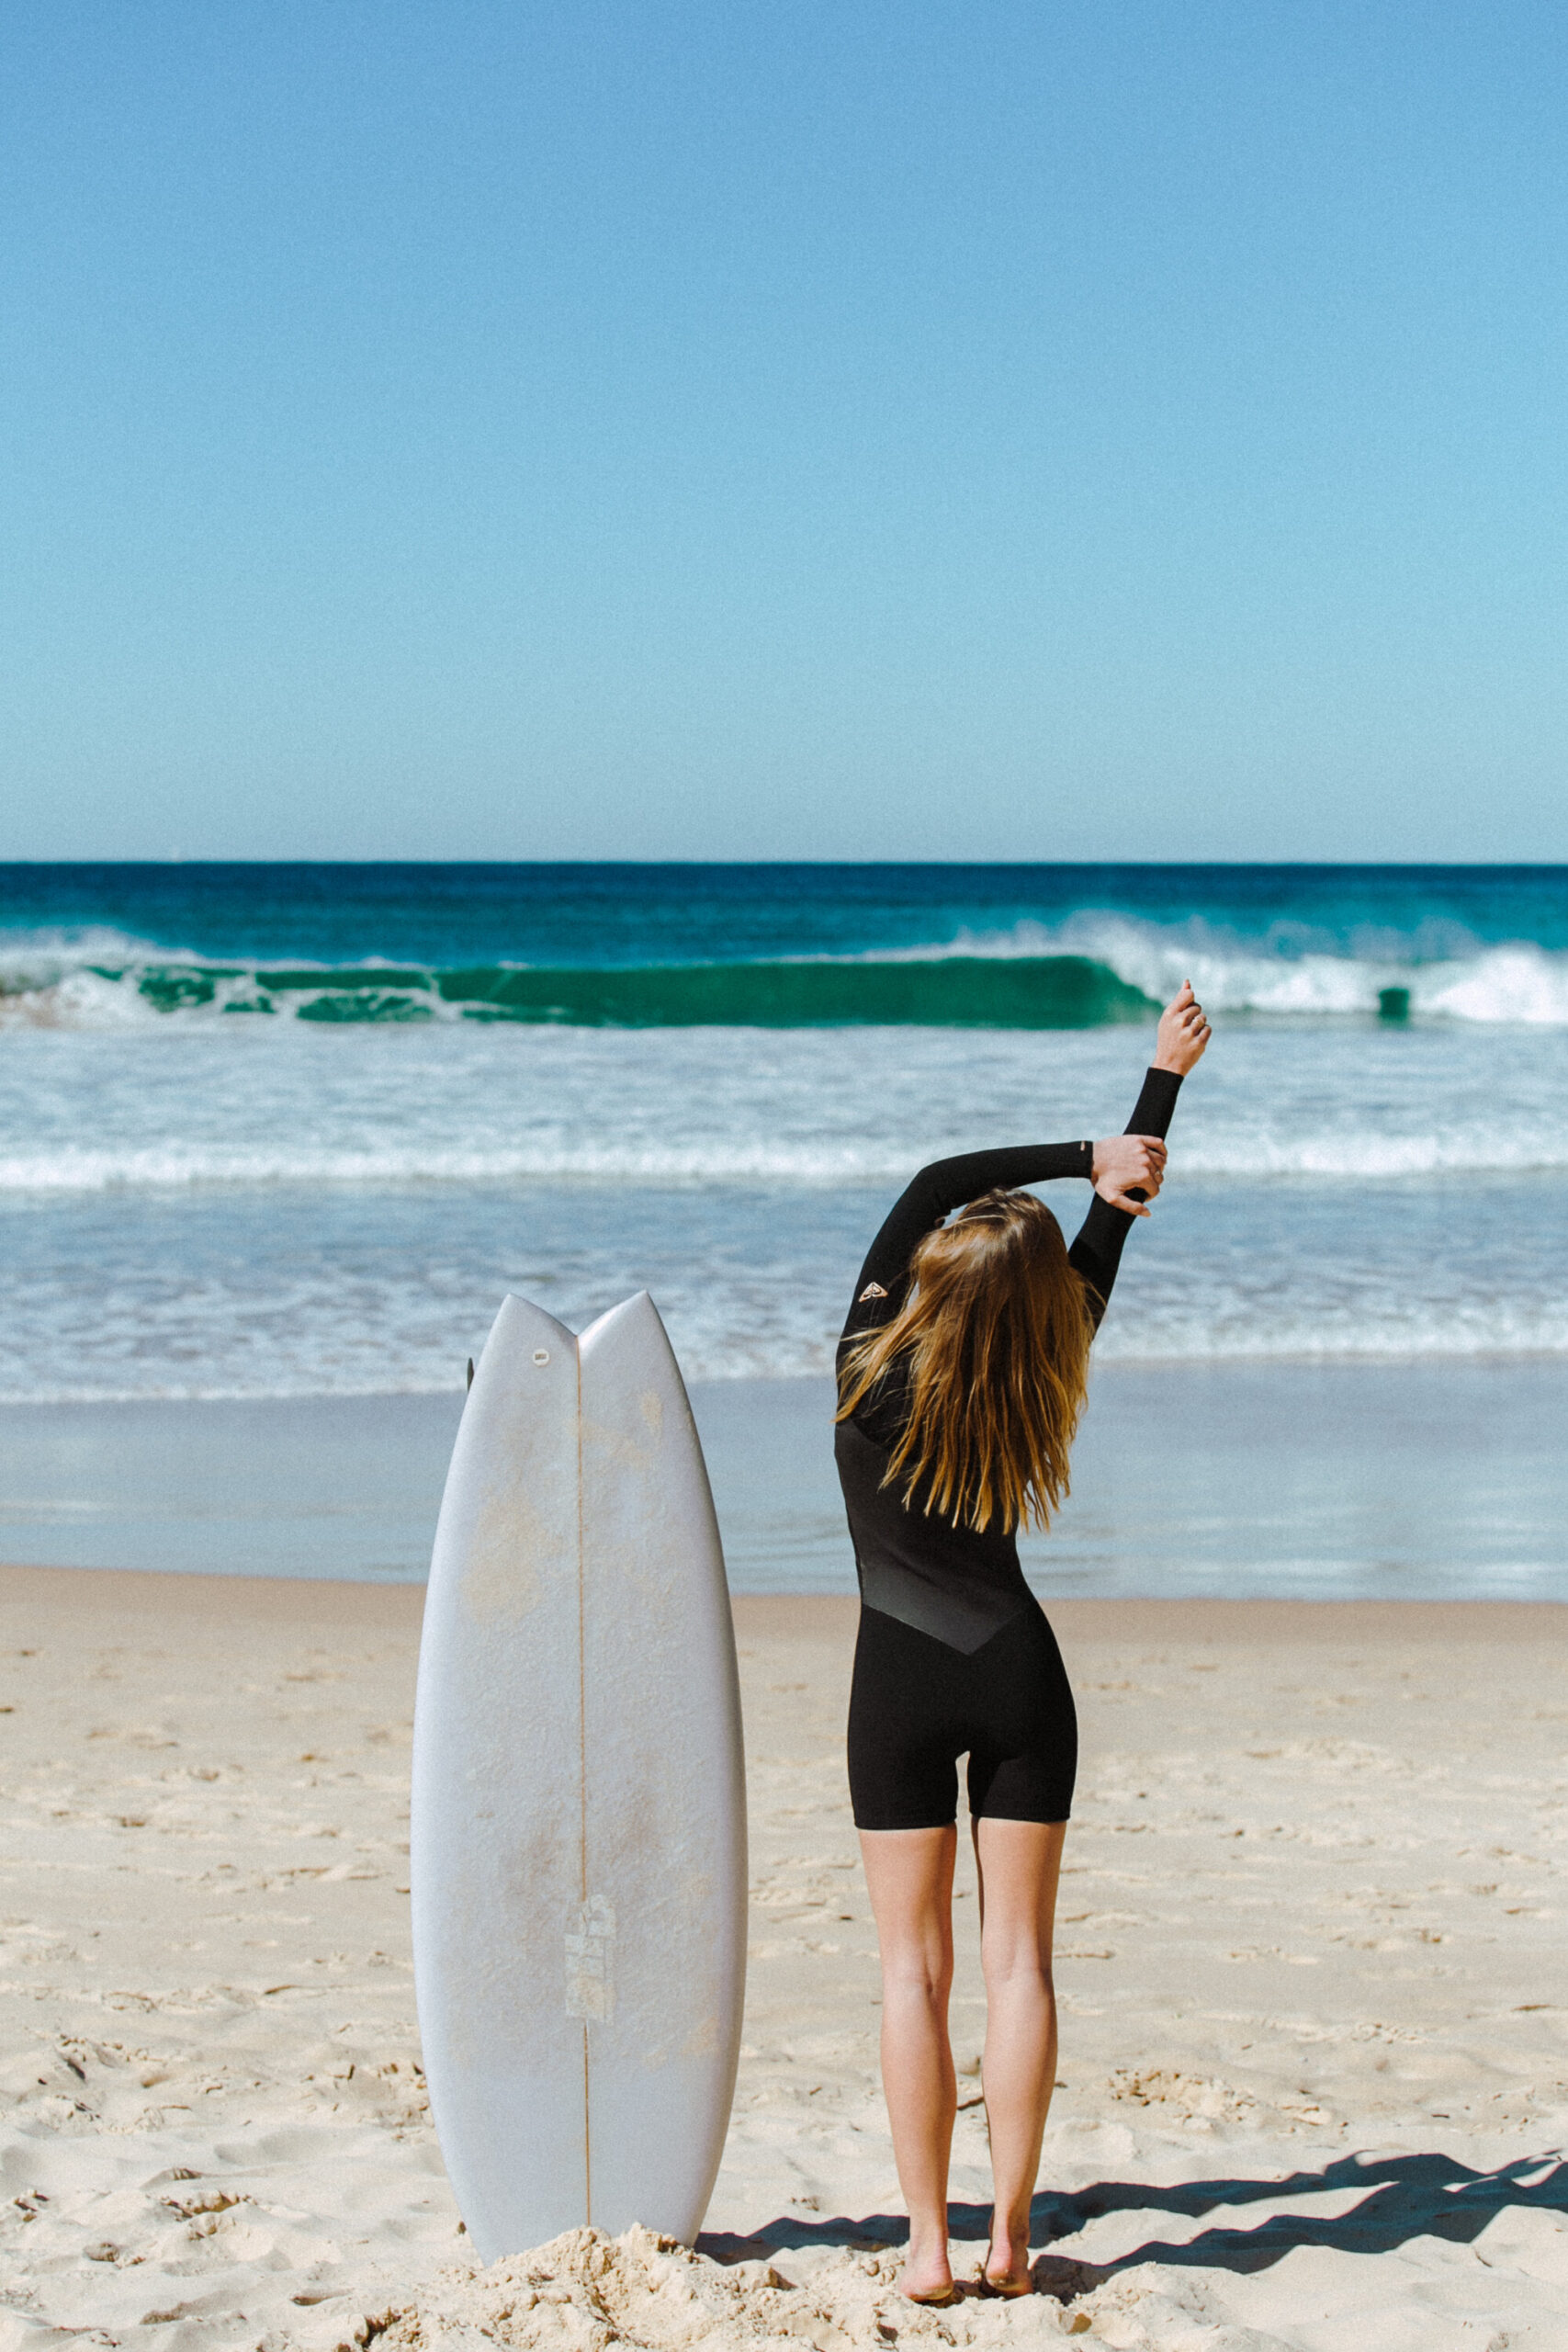
I found some time to slow down on a glorious morning in Greece, on the island of Mykonos (fancy, I know, I can’t believe I just wrote that).
I got to stretch out all my kinks and take some much needed quiet time. Our hotel room happened to have this huge balcony, which came as a perfect setup to lay down my mat. I thought it would be great to break down the video flow for you guys to try at home.
Try one, try them all. Do them in flow or seperate. The poses focus on lower back, hips, and side body. Body parts that tend to get really tight from long hours of sitting in a small economy chair. Your body will thank you. You can thank me, later.
Keep in mind to take take care of yourselves when trying these poses, some of these are quite advanced and you need to be able to come in and out of them safely, so don’t do anything you don’t feel comfortable with.
Try these 7 yoga poses after a long flight
Downward Facing Dog + One Leg Downward Dog
Works : Shoulders, Backs, Hamstrings, Lower Back.
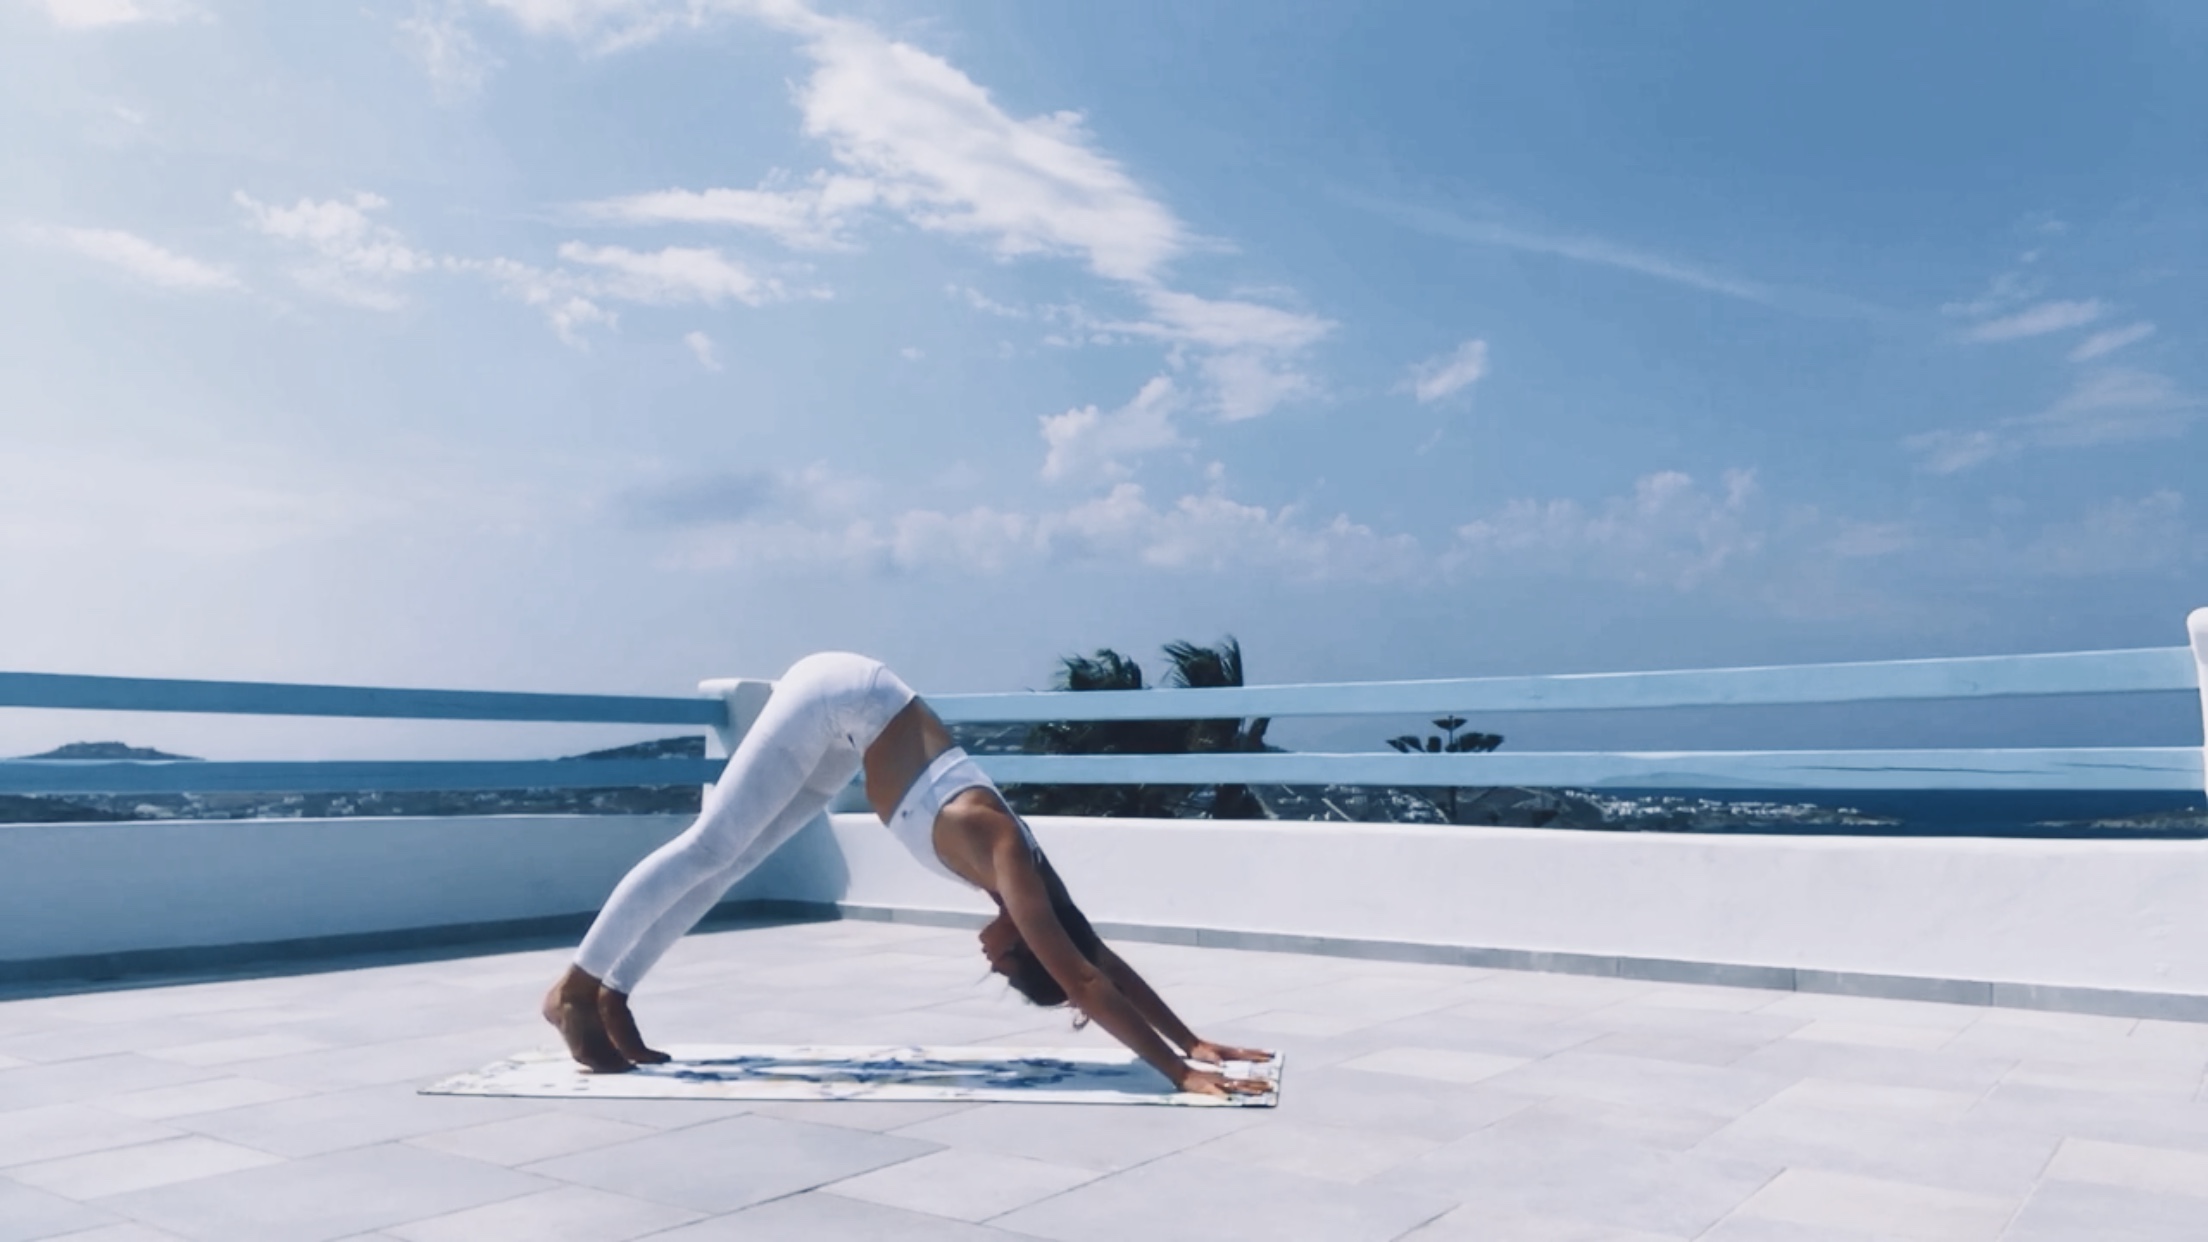
How To:
-
Place your hands and feet on the mat and stick your butt up. It may feel awkward and uncomfortable at first, so get into it by bending your knees.
-
The more you bend your knees the more space you provide for your lower back if you have tight hamstrings.
-
Tip: Press firmly down with your hands and fingers, and try and relax your shoulders away from your ears. Stay for 4-5 breaths.
One legged downward dog : For the more advanced, drop down to one elbow, raise your right leg, bend your knee and stack your hips. You should get a great side body stretch on the right side of your body. Stay for 4-5 breaths and switch sides.
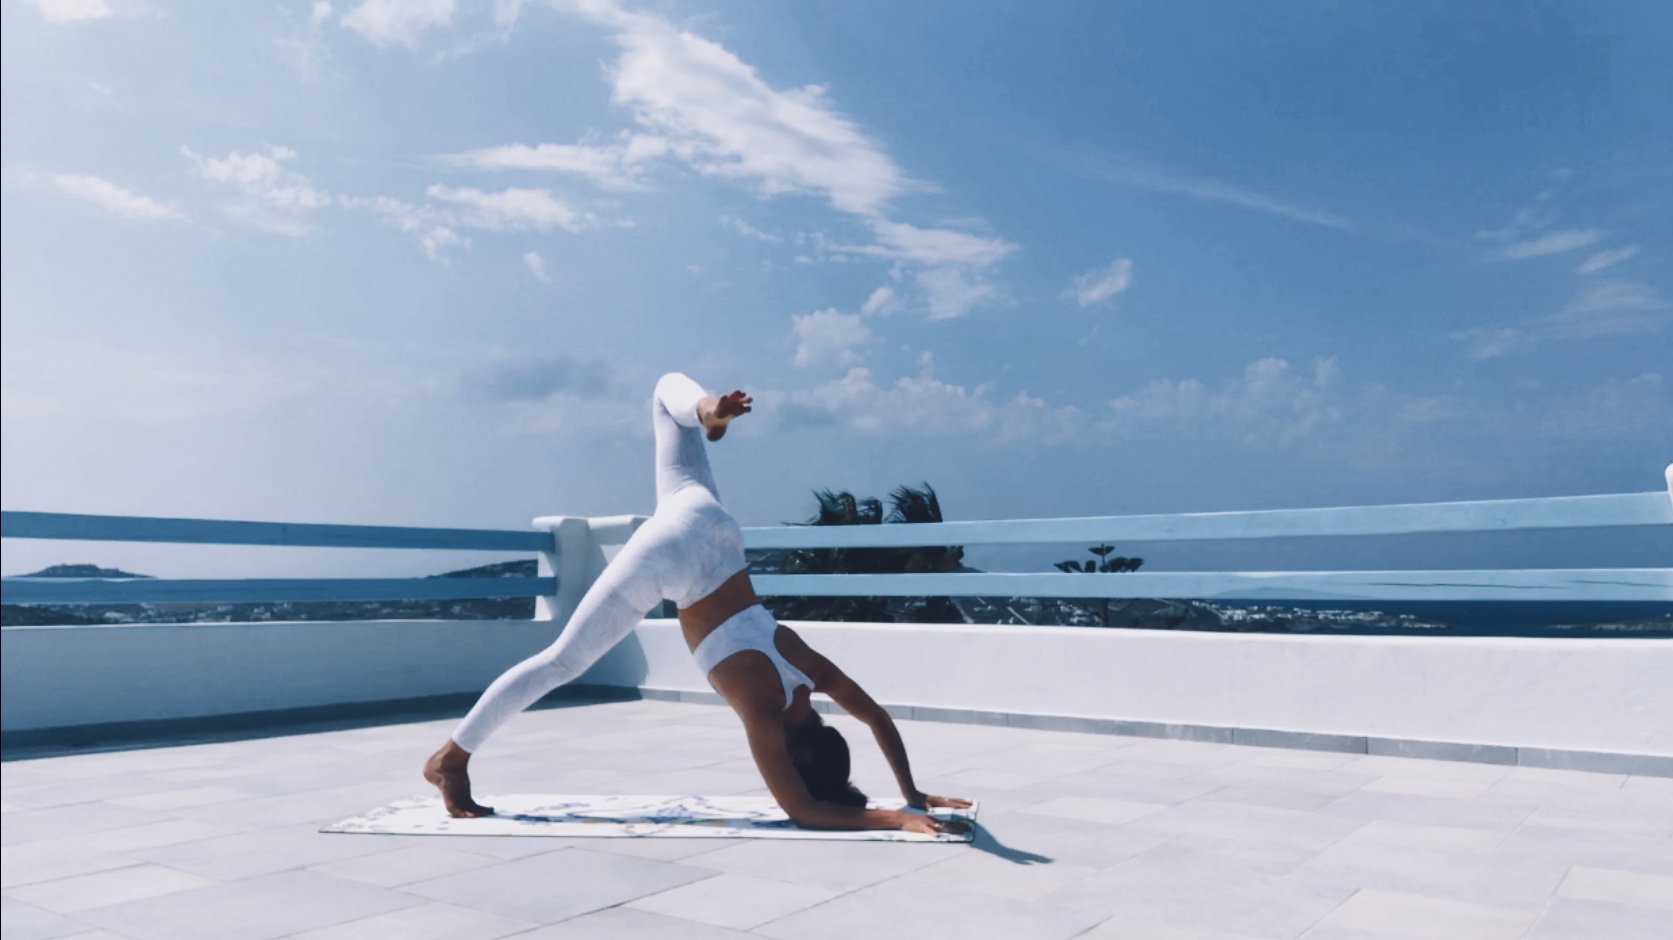
Reverse Warrior to Side Angle Pose
Stretches : Lateral sides Right and Left, Arms, Thighs.

How To :
-
Start in Warrior I , with your right foot forward, and make sure your back foot is flat, pressing down firmly into the mat.
-
Bend your right knee so it’s directly above your ankle (not past, it’s bad for your joints!)
-
Bring your right arm up (as picture below) and stretch your ride side body. You will feel it, trust me. Keep your right knee bent, and press into your right foot, a lot.
-
To transition to side angle, bring your right elbow to your knee, and your left arm up. Really press into your left foot (the back foot) so that there’s a long, stretching line from your heel to your pink finger.
The transition from Reverse Warrior to Side Angle is what makes this sequence so great, because your stretching both sides of your body equally, getting into your arms, shoulders and hips. Go from one to the other a couple times. Breathing in and out with each move.
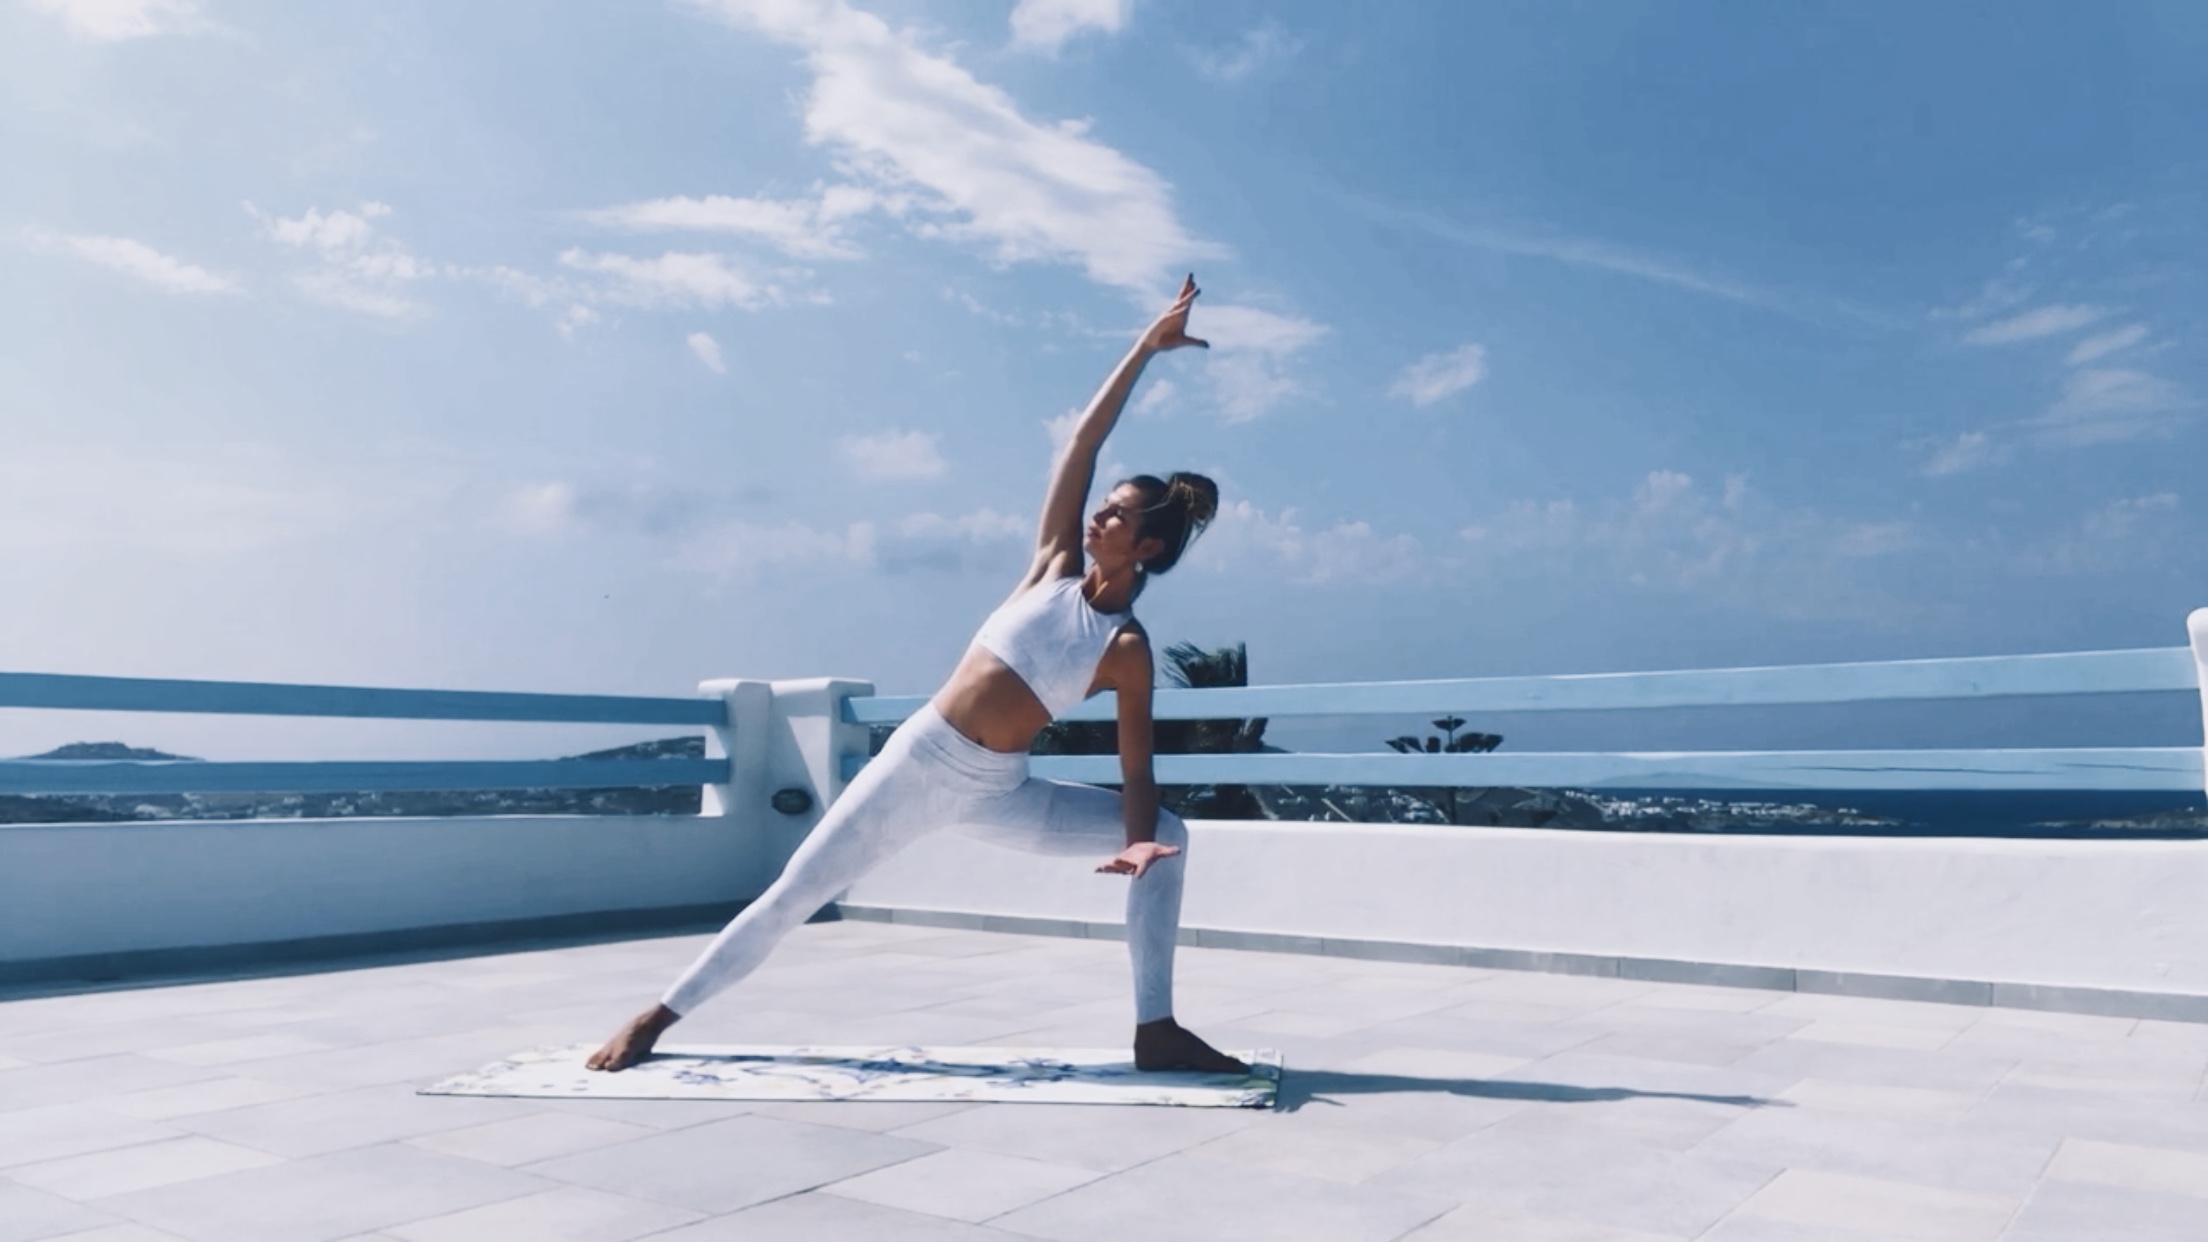
Triangle (Trikonasana) to Reverse Triangle
Stretches: Hamstrings, quads, IT Band, Side Body.

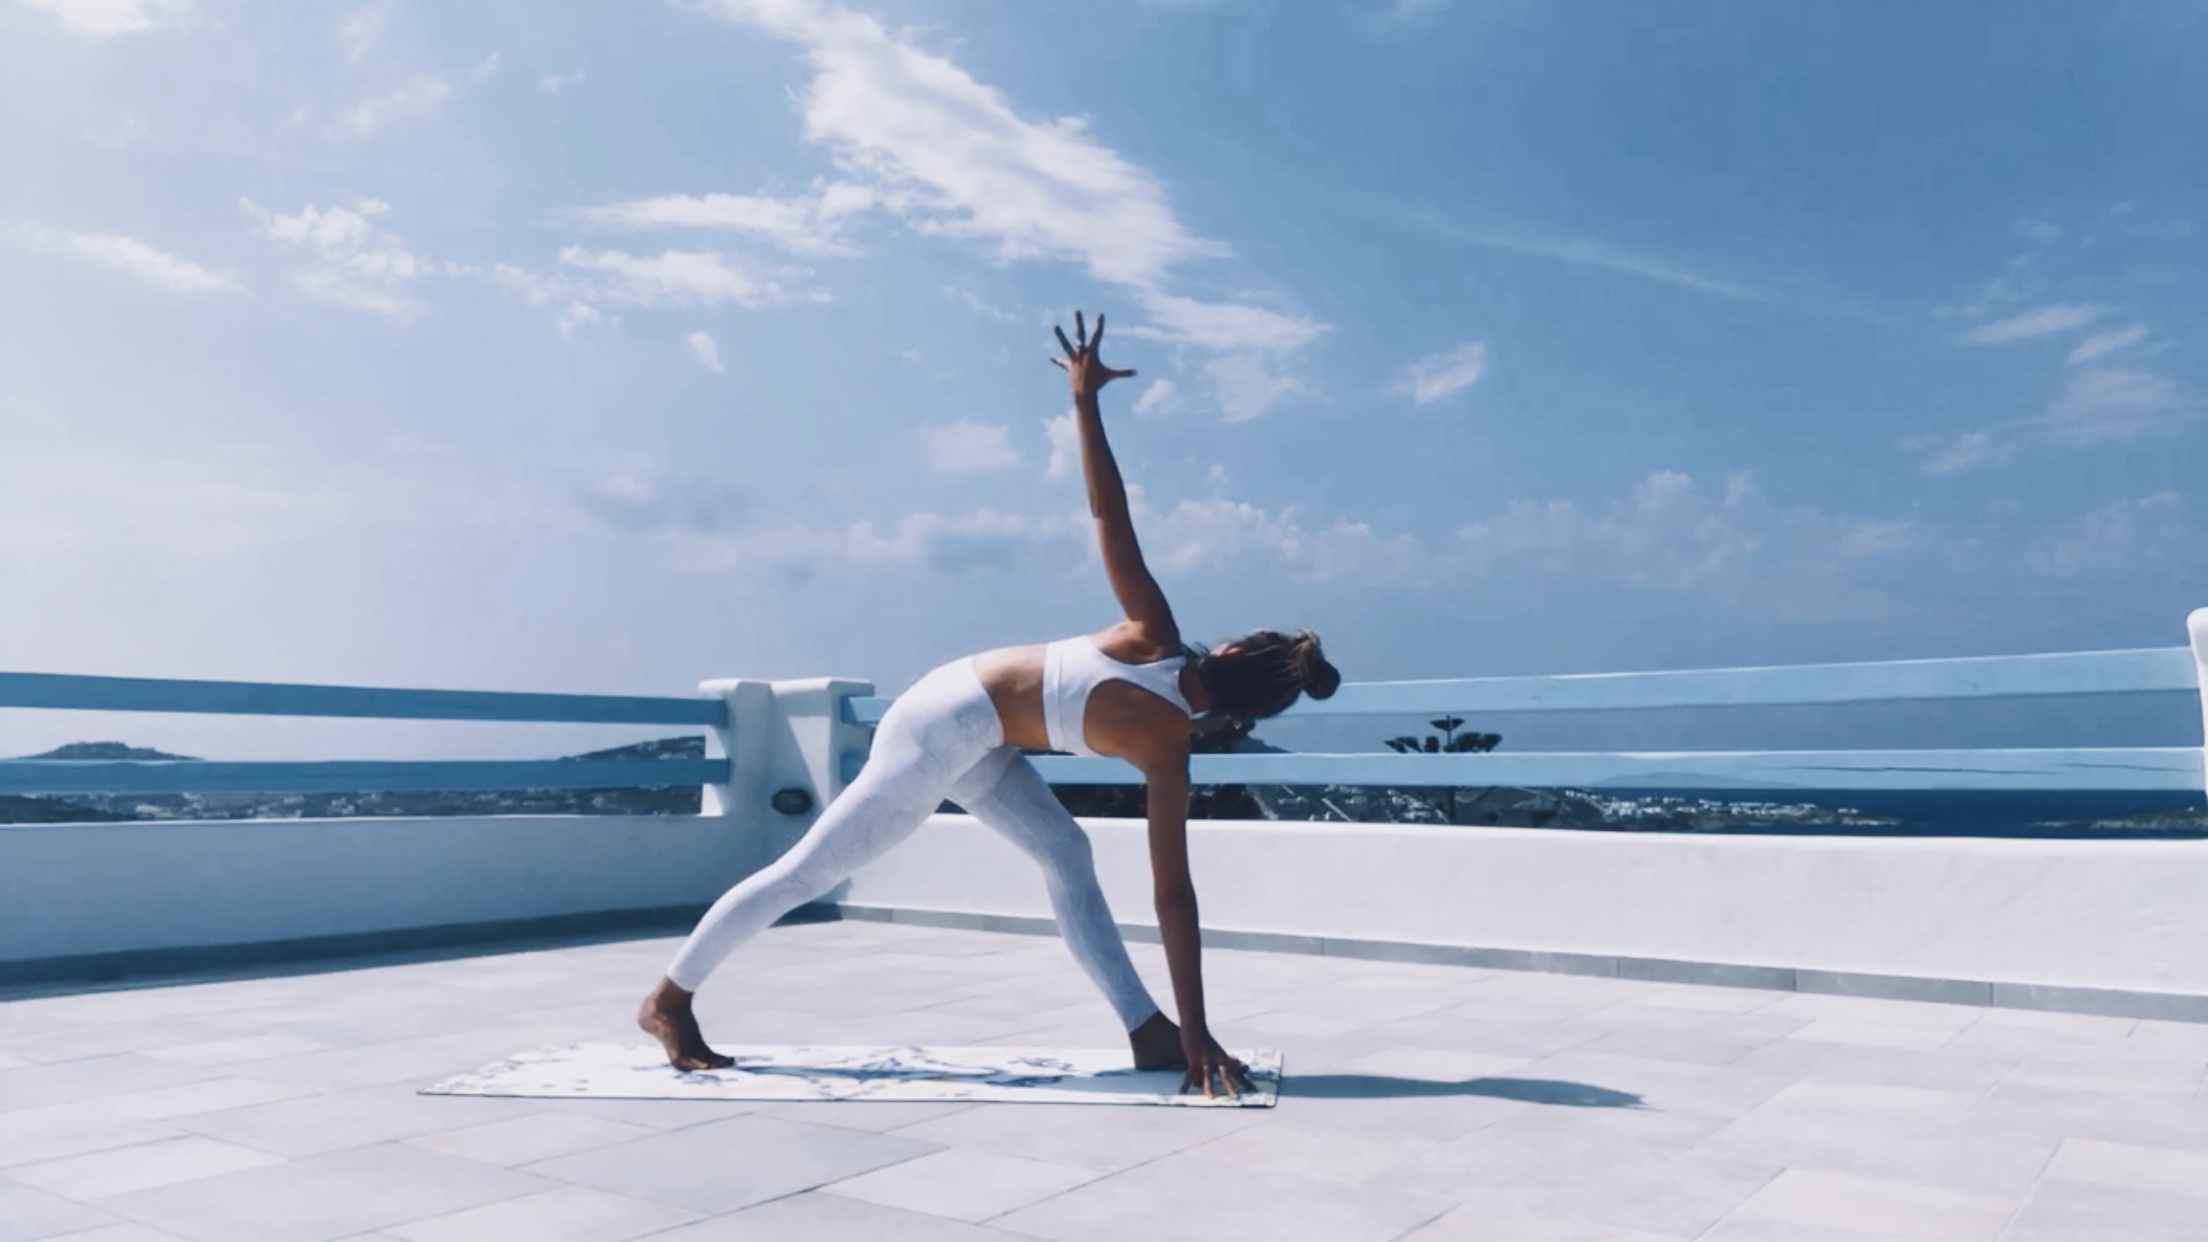
How To:
-
This is one of those so-good-it-hurts poses that may take you a little practice to get into. From your Reverse Warrior (pictured above) straighten your leg. Make sure your hip is hugging back, under your body (think : “squeeze my butt cheek in”)
-
Reach your fingertips as far out in front of you as you can. Bring your hand down to your ankle or a block if you have one (really handy!).
-
You should be pressing down really firmly with your back foot and reaching up really tall with your top hand(as pictured) — the stretch is happening in your hamstring, your lower back and side left body.
-
Note: Protect your front knee, bend it a little so that you’re not hyperextending.
The reverse triangle is quite tricky, and can be a little painful if you’re very tight in the back and side leg, so please come into this carefully. Notice how my back foot is off the heel in the second picture, you need your hips to be square to the front of the mat, that means facing forward. From here bring the top hand down, reach the opposite arm up, then twist towards the leg that is in front. Stay for 4-5 breaths, if you can!
Bridge pose to Wheel Pose
Stretches : Back, Front hips, Thighs, Shoulders, Chest
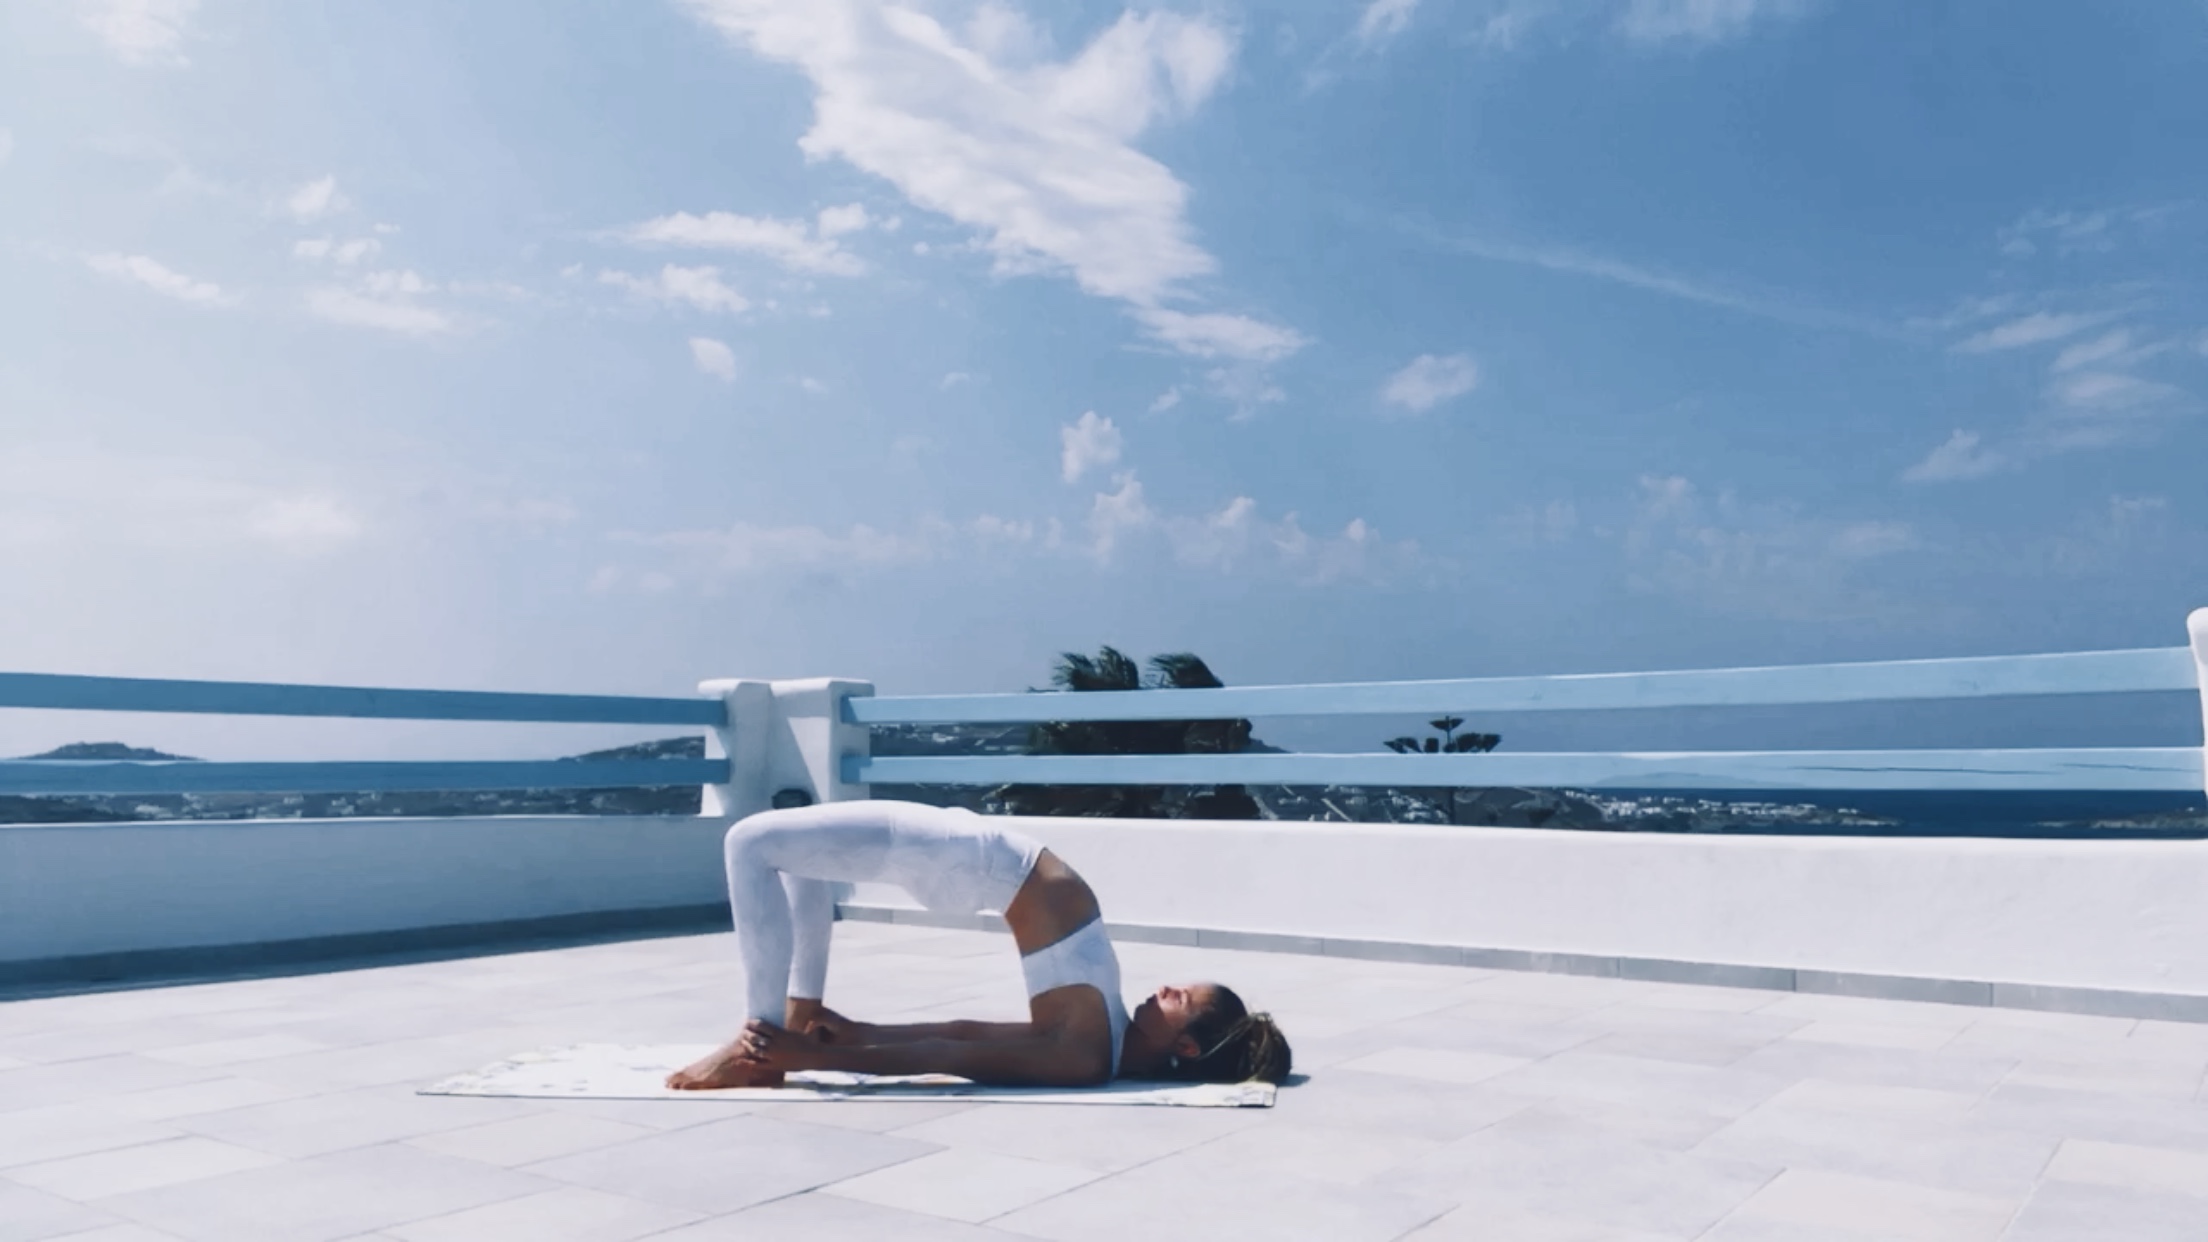

How to: Bridge pose is one of those poses you have to come into very carefully and be mindful of any lower back issues you may have. Consult a doctor or physician if you’re not sure.
-
Start with your feet on the floor and your knees bent. You should be able to touch your ankles with your fingertips.
-
Raise your hips up as high as you can, keeping in mind to have both knees facing forward (as in — not splaying out) and your inner thighs wrapping down. Hug your inner thighs gently towards each other.
-
For a bonus chest stretch, interlace your hands behind your back and squeeze your shoulder blades together.
For Wheel Pose, Only come into wheel if you have done it before and you know how to do it safely. Consult an expert or a yoga teacher to physically help you practice into it.
Supine Twist
Stretches : Lower Back, Spine, Side Body
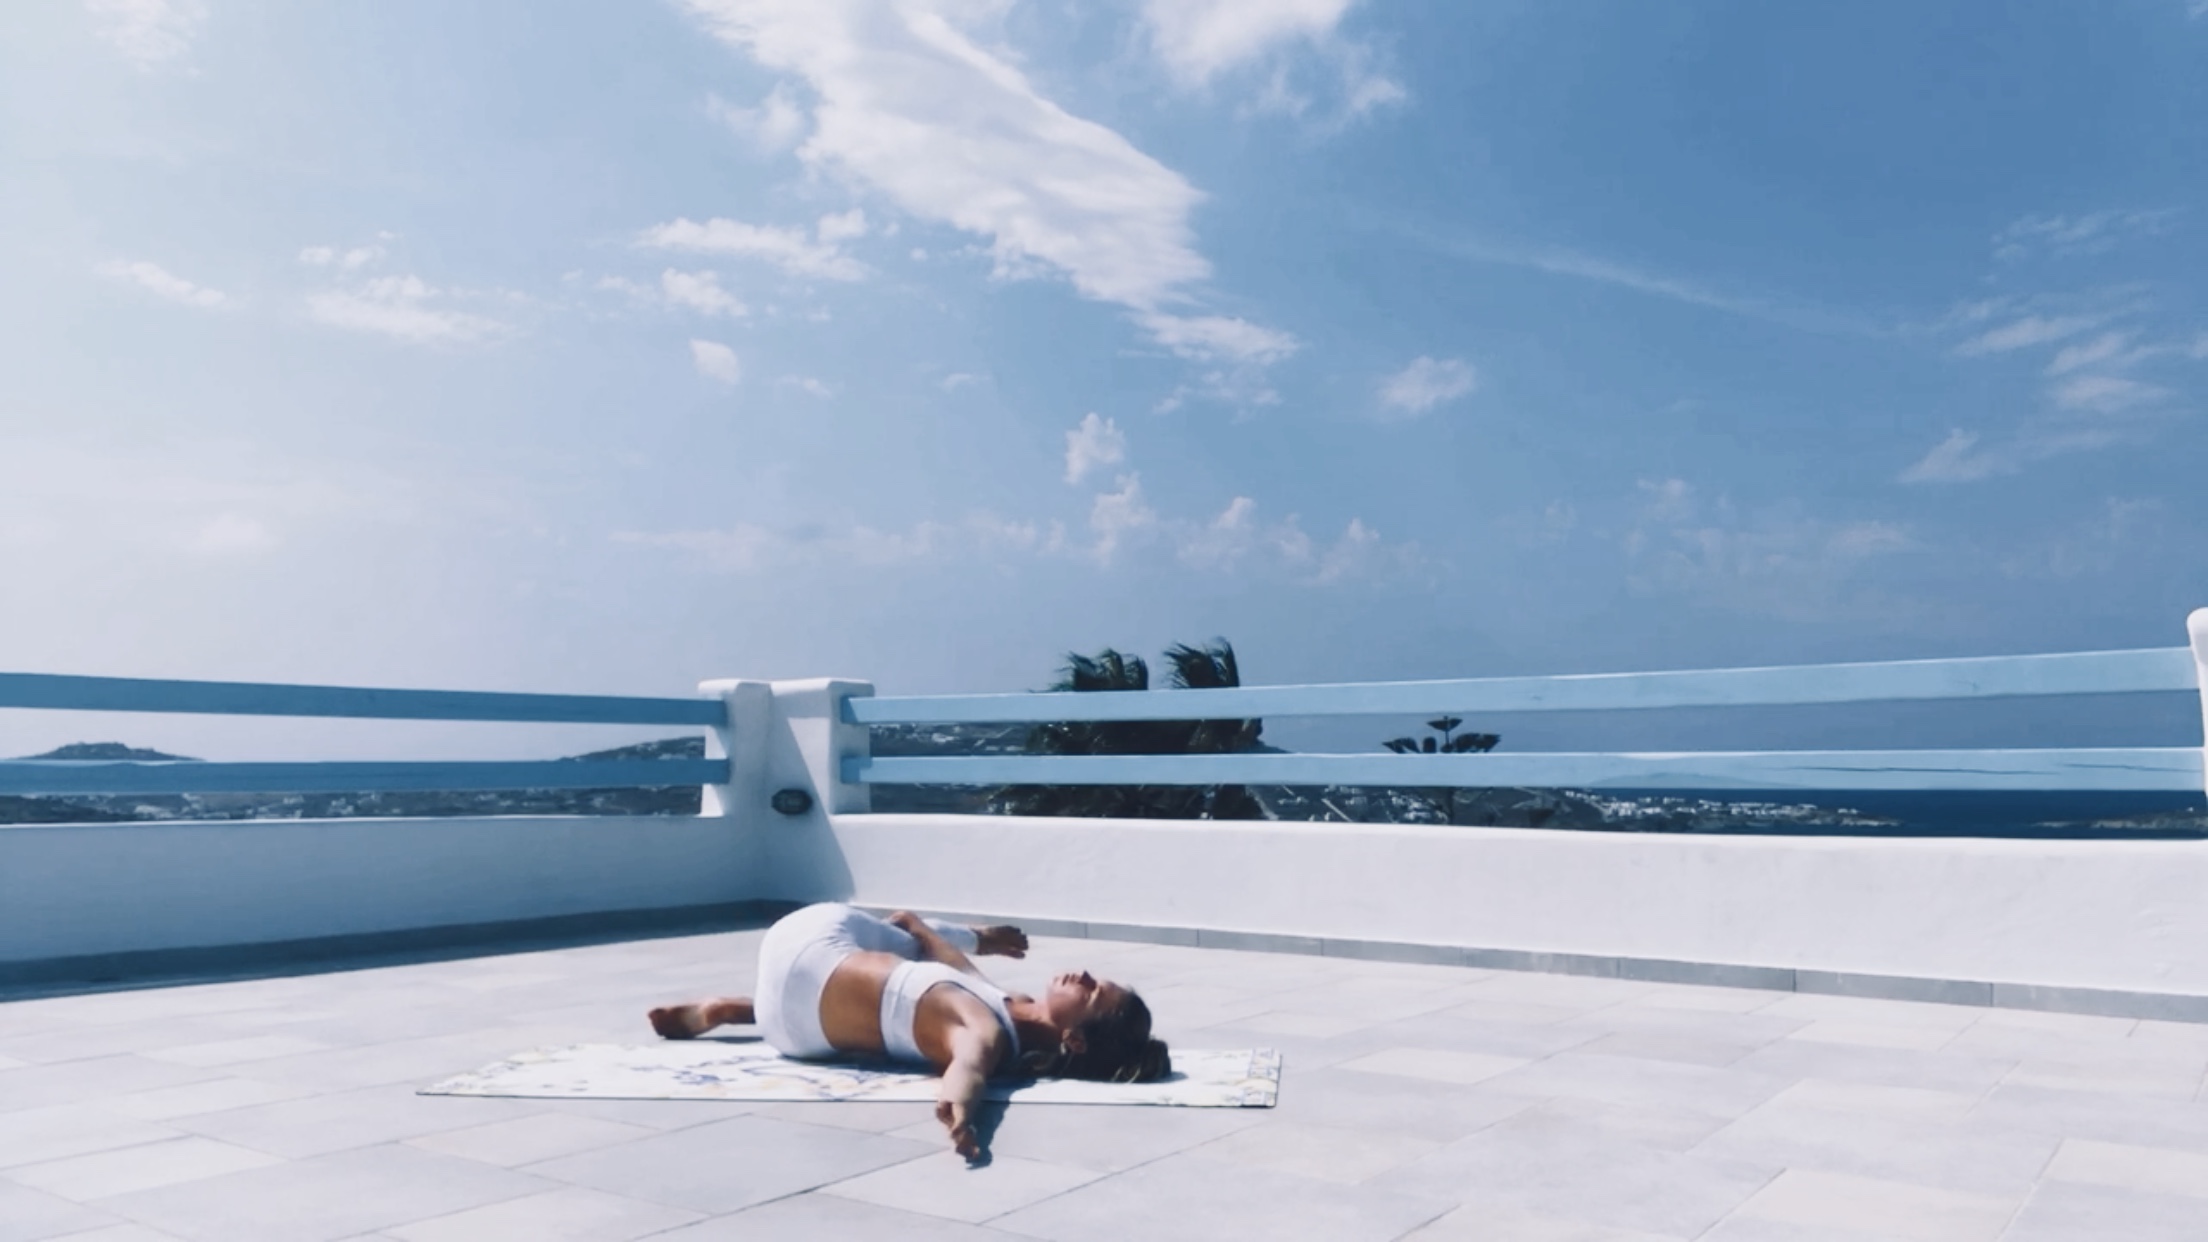

How To: This pose is a great transition after bridge (above).
-
Start by bring your right knee into your chest, and shift your hips over to the right.
-
Let your right leg fall over to the left. Keep your both shoulders evenly onto your mat. Your bottom leg can stay bent or extended. You will get a nice twist through your torso. Switch sides after 4-5 breaths.
Half King Fish Pose

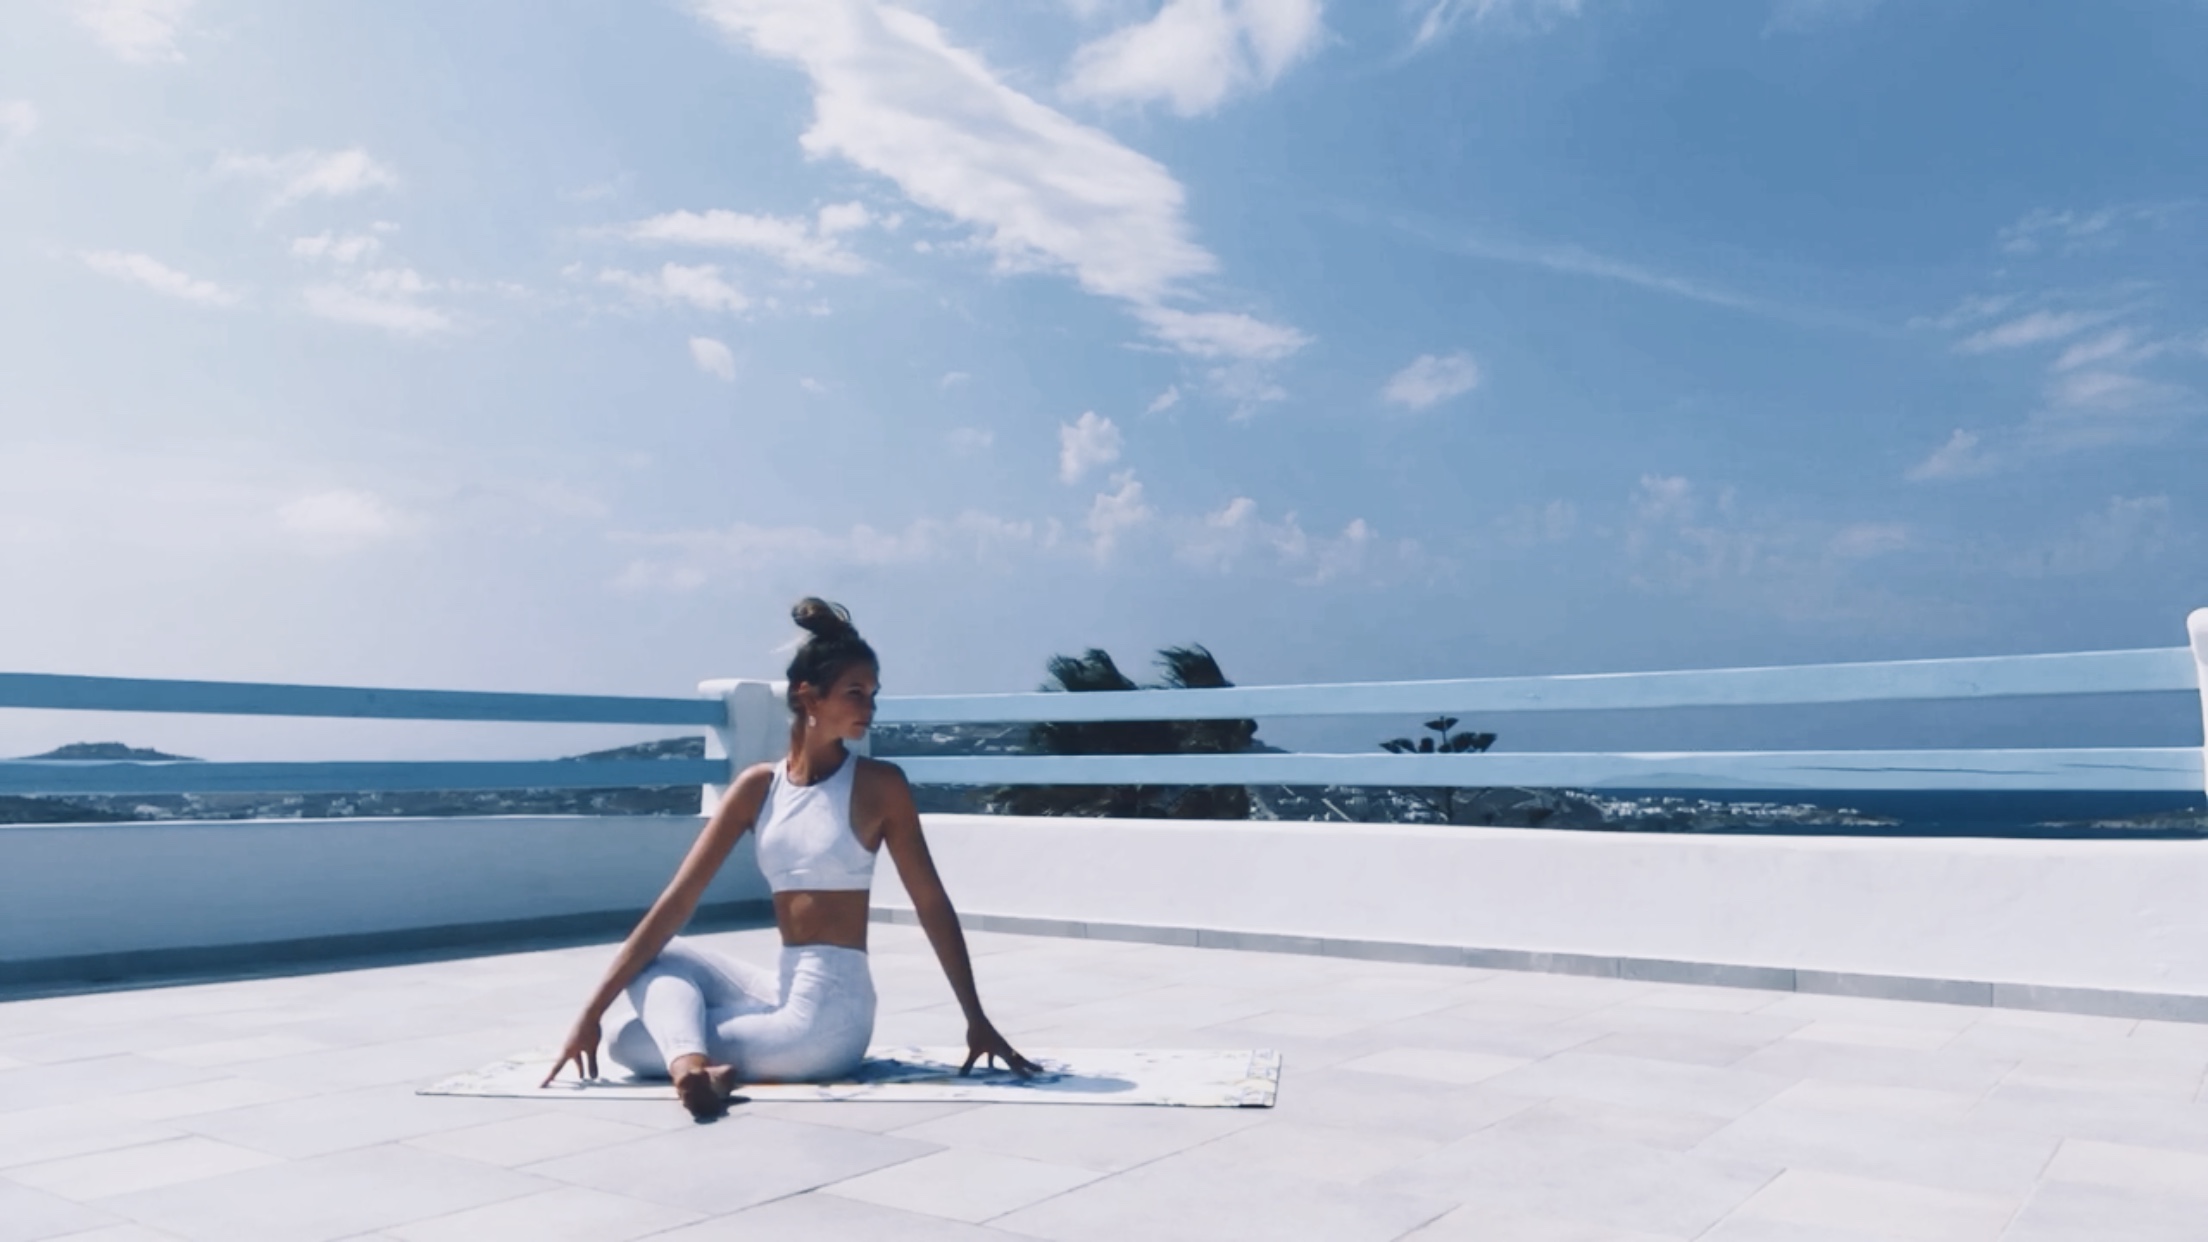
Another spinal twist, this one feels really great at the end of your sequence. Make sure your gently engaging your core when twisting to protect your spine.
-
Sitting upright, cross your right ankle to the outside of your left knee (your left leg is bent, heel by your hip).
-
Bring your left elbow across your right knee (pictured) and twist to your right.
-
Try and keep the spine as upright as possible, using your back hand (your right hand) to support you. Hold for 4-5 breaths.
-
To counter twist, leave the legs as they are, simply twist the other way. Keep the spine nice and tall.
-
Switch legs, with your left leg on top.
Half Pigeon
Stretches : Hips, Glutes, all the very tight spots!
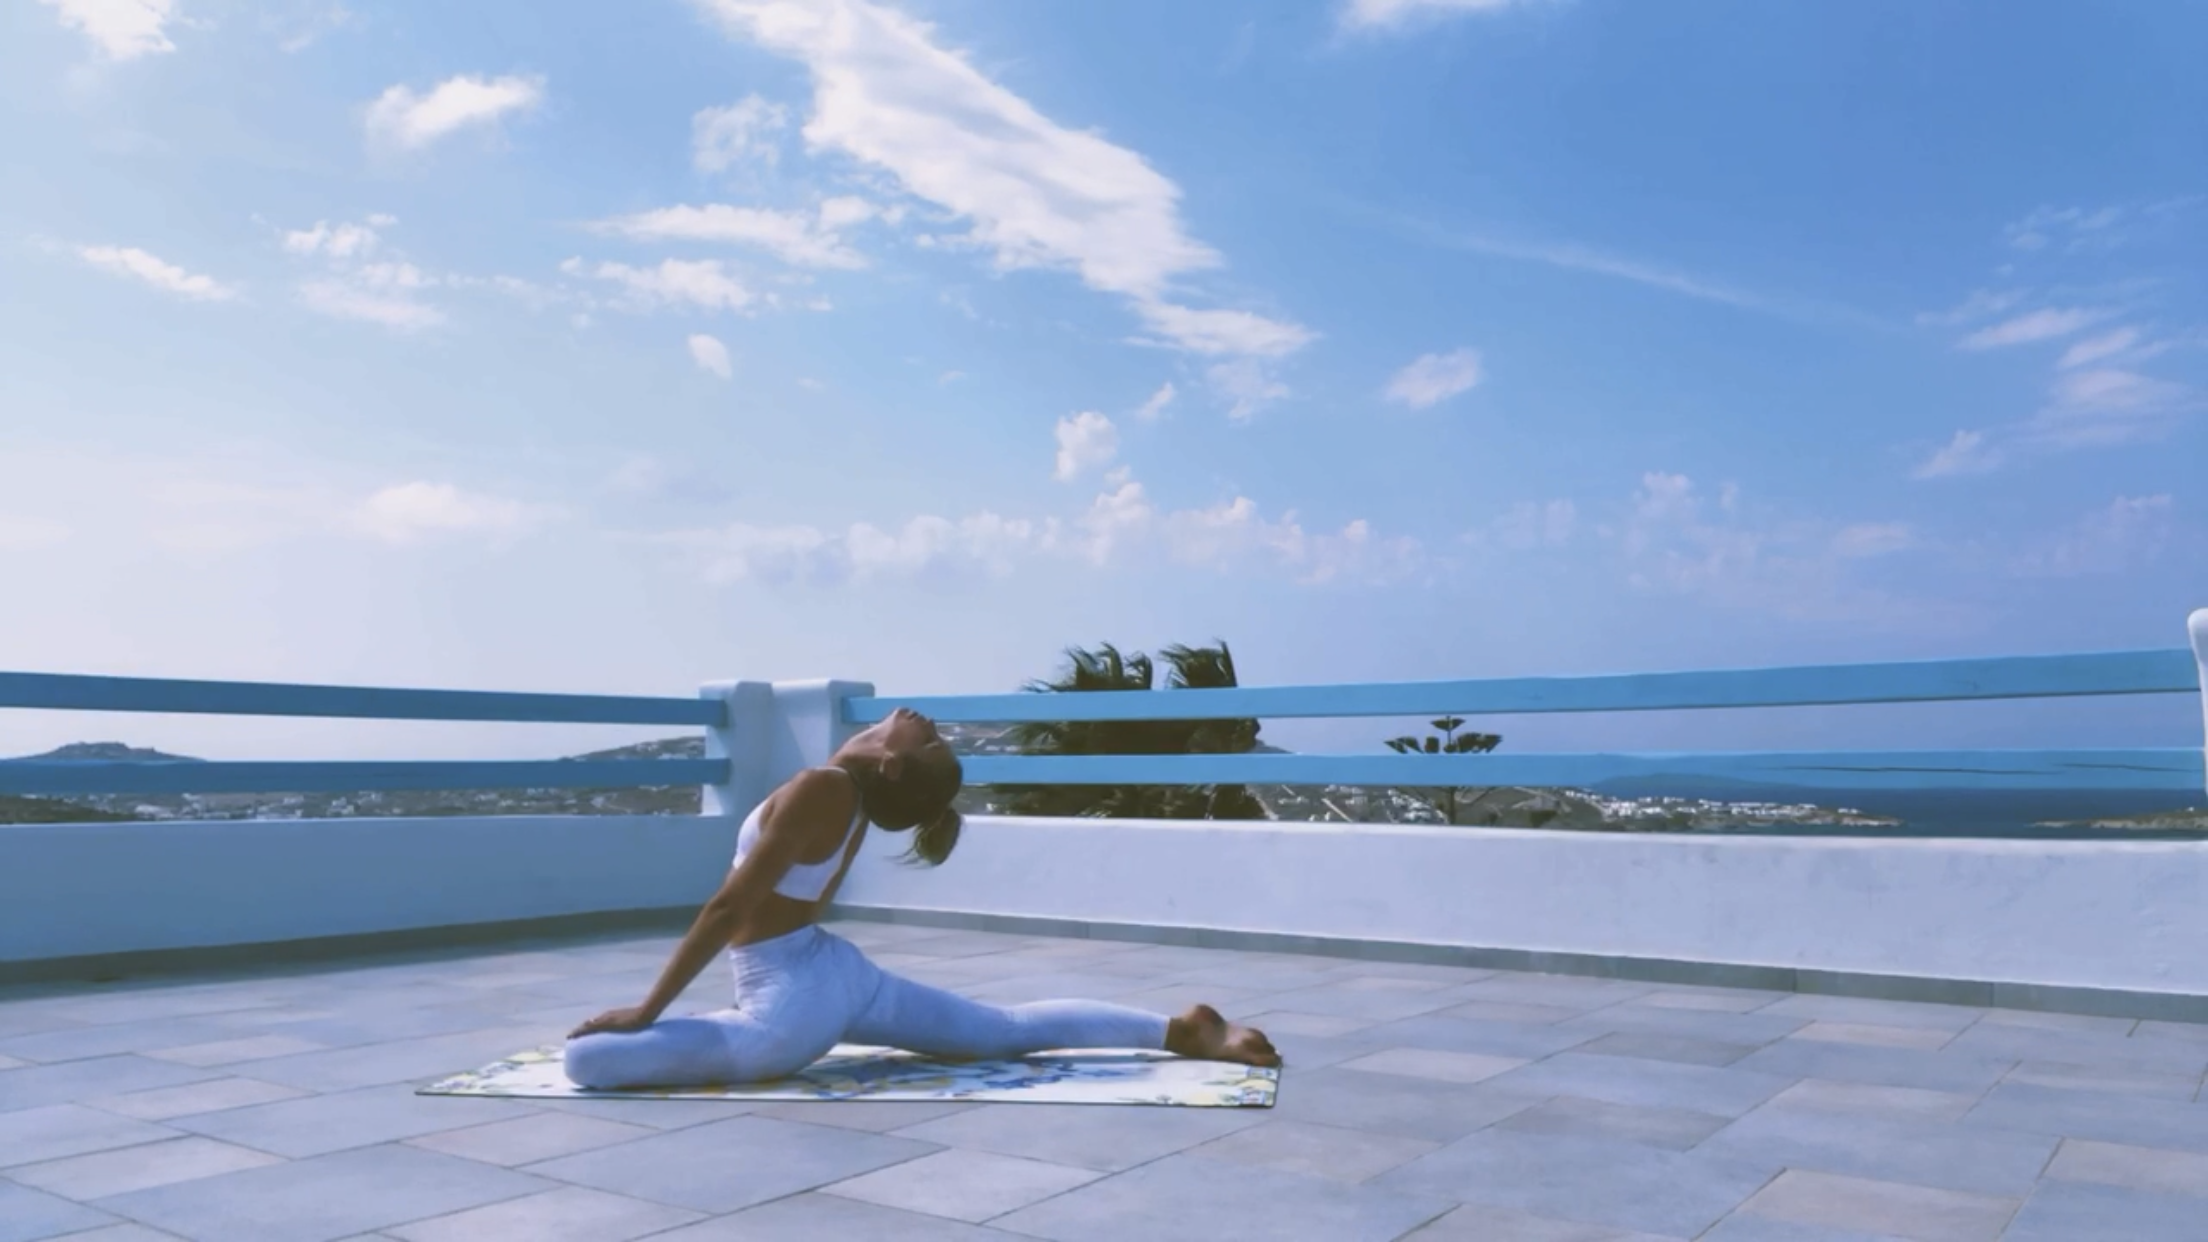

How To : Nothing like a good hip stretch to finish a sequence. This pose will have your hips singing, possibly screeching, sighs on relief. Be very gentle the first time you try this pose as it’s quite intense if you’ve never done it before or do it very rarely.
-
Bring your right shin to the front of the mat, it can be parallel, if you’ve got the range in your hips, or your heel can be by your opposite hip (As in, right heel to left hip), make sure you are flexing your toes towards your knee (this protects your ankle and knee)
-
Your left leg is straight behing you. Try and keep your hips level. If your hip is too far off the mat, consider placing a towel, block or something under that hip to support it.
-
Take 5-10 long breaths on each side.
READ LATEST
the


feartured post
Our New
Living Room
This could go to a blog post, an Amazon shop, a page of your site, your like to know it — whatever you want!


")

BEST THE JOURNAL
of
think we might be a fit?
Let’S TELl Great STories
Ready to be a part of the greatest sisterhood in surfing?


follow along @Noshoes_noworries
Elsewhere
on TikTok
on YouTube (coming soon)
on Instagram
on Threads
@noshoenoworries
+ Show / Hide Comments
Share to: