
The one yoga pose to relieve lower back pain
Spend a lot of time paddling in the surf? — Don’t we all.
You probably already know that the muscles required to lift your chest when paddling — thereby helping you balance on your board more effectively — involve a lot of activation in the lower back.
Quick Anatomy 101: The erector spinae — a.k.a larger muscles in your lower back — support your spine (think: “Erect Spine”). These can often seize up or feel sore after a session. It’s important to activate your core (tummy muscles) gently when you’re paddling, to protect and support the work that’s being done by your lower back muscles. It’s also beneficial to stretch before and/or after a session to reduce the chances of long term injuries. Paired with hours seated at a desk and poor posture, if left untreated lower back pain will just plain bother your t’ill the end of time. You’ll end up like that cranky ol’ salty sea dog in the lineup. And No one likes him.
Sweet, Sweet, Relief: Here’s a stretch to relieve lower back pain after paddling
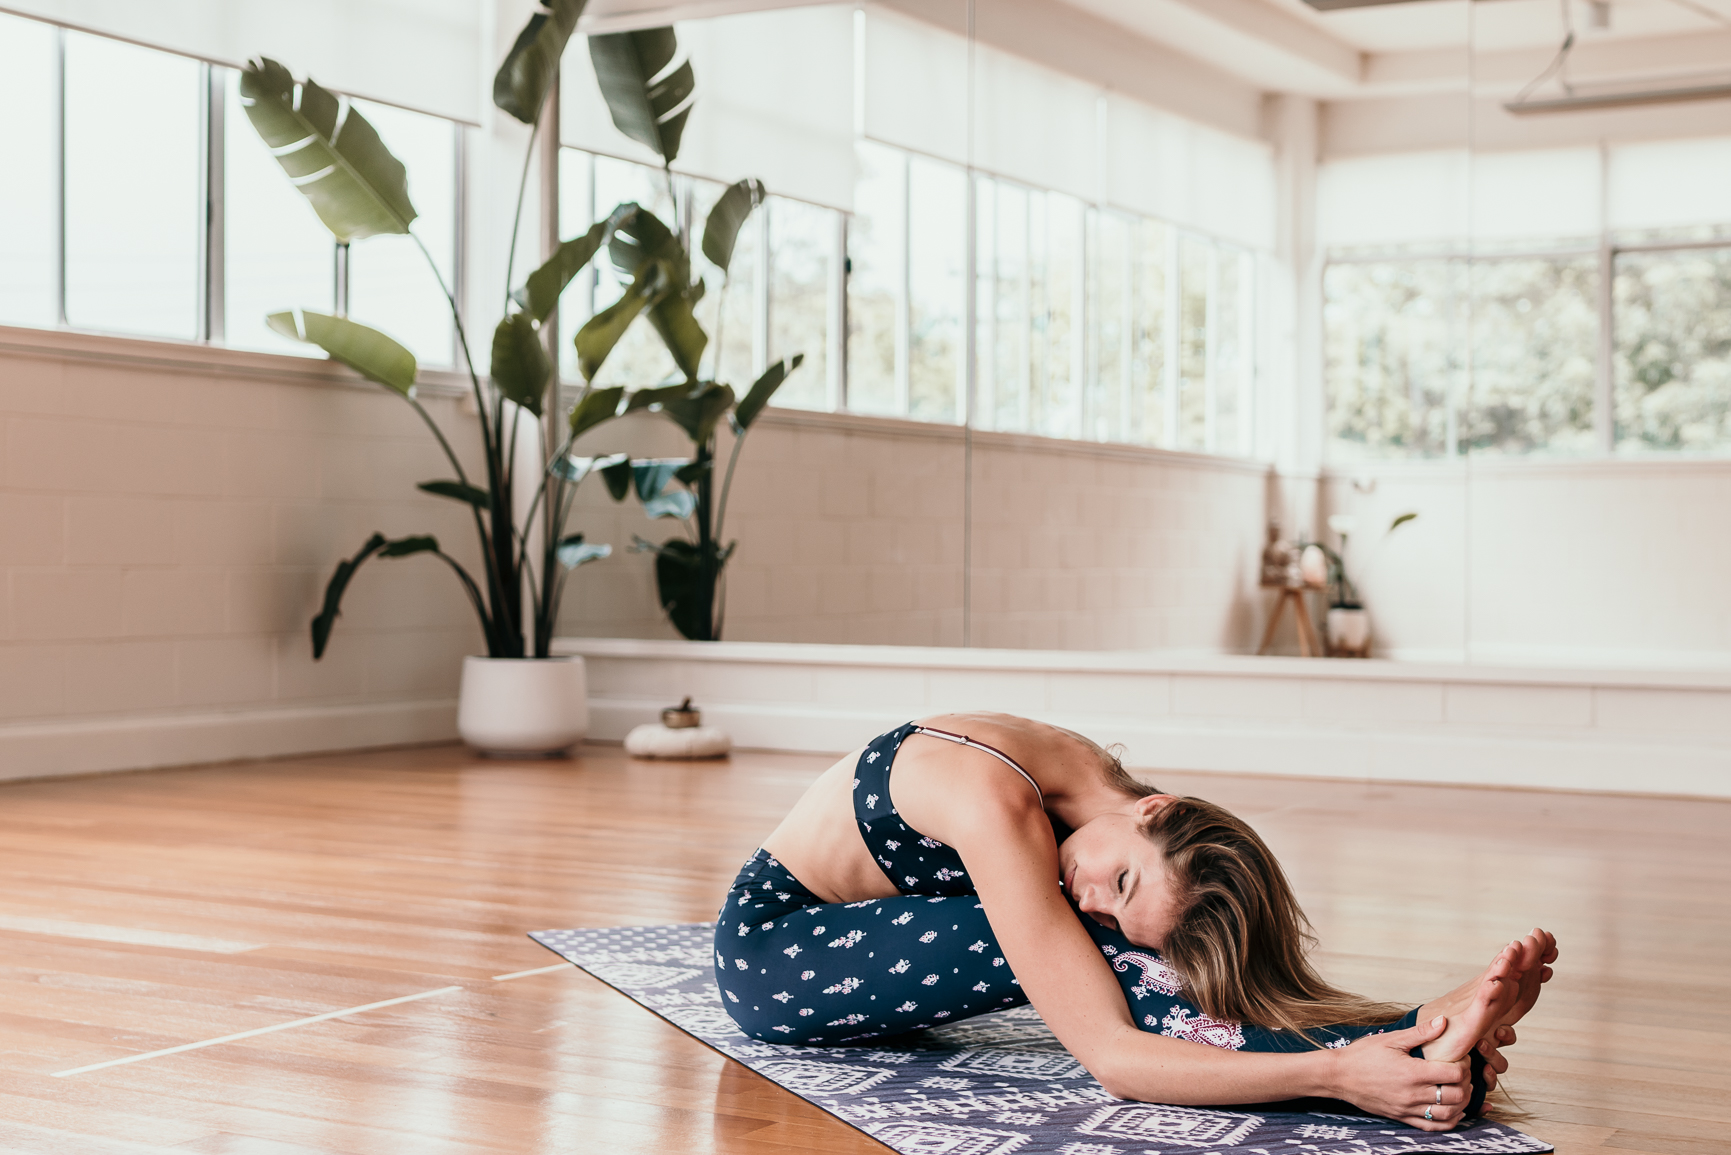
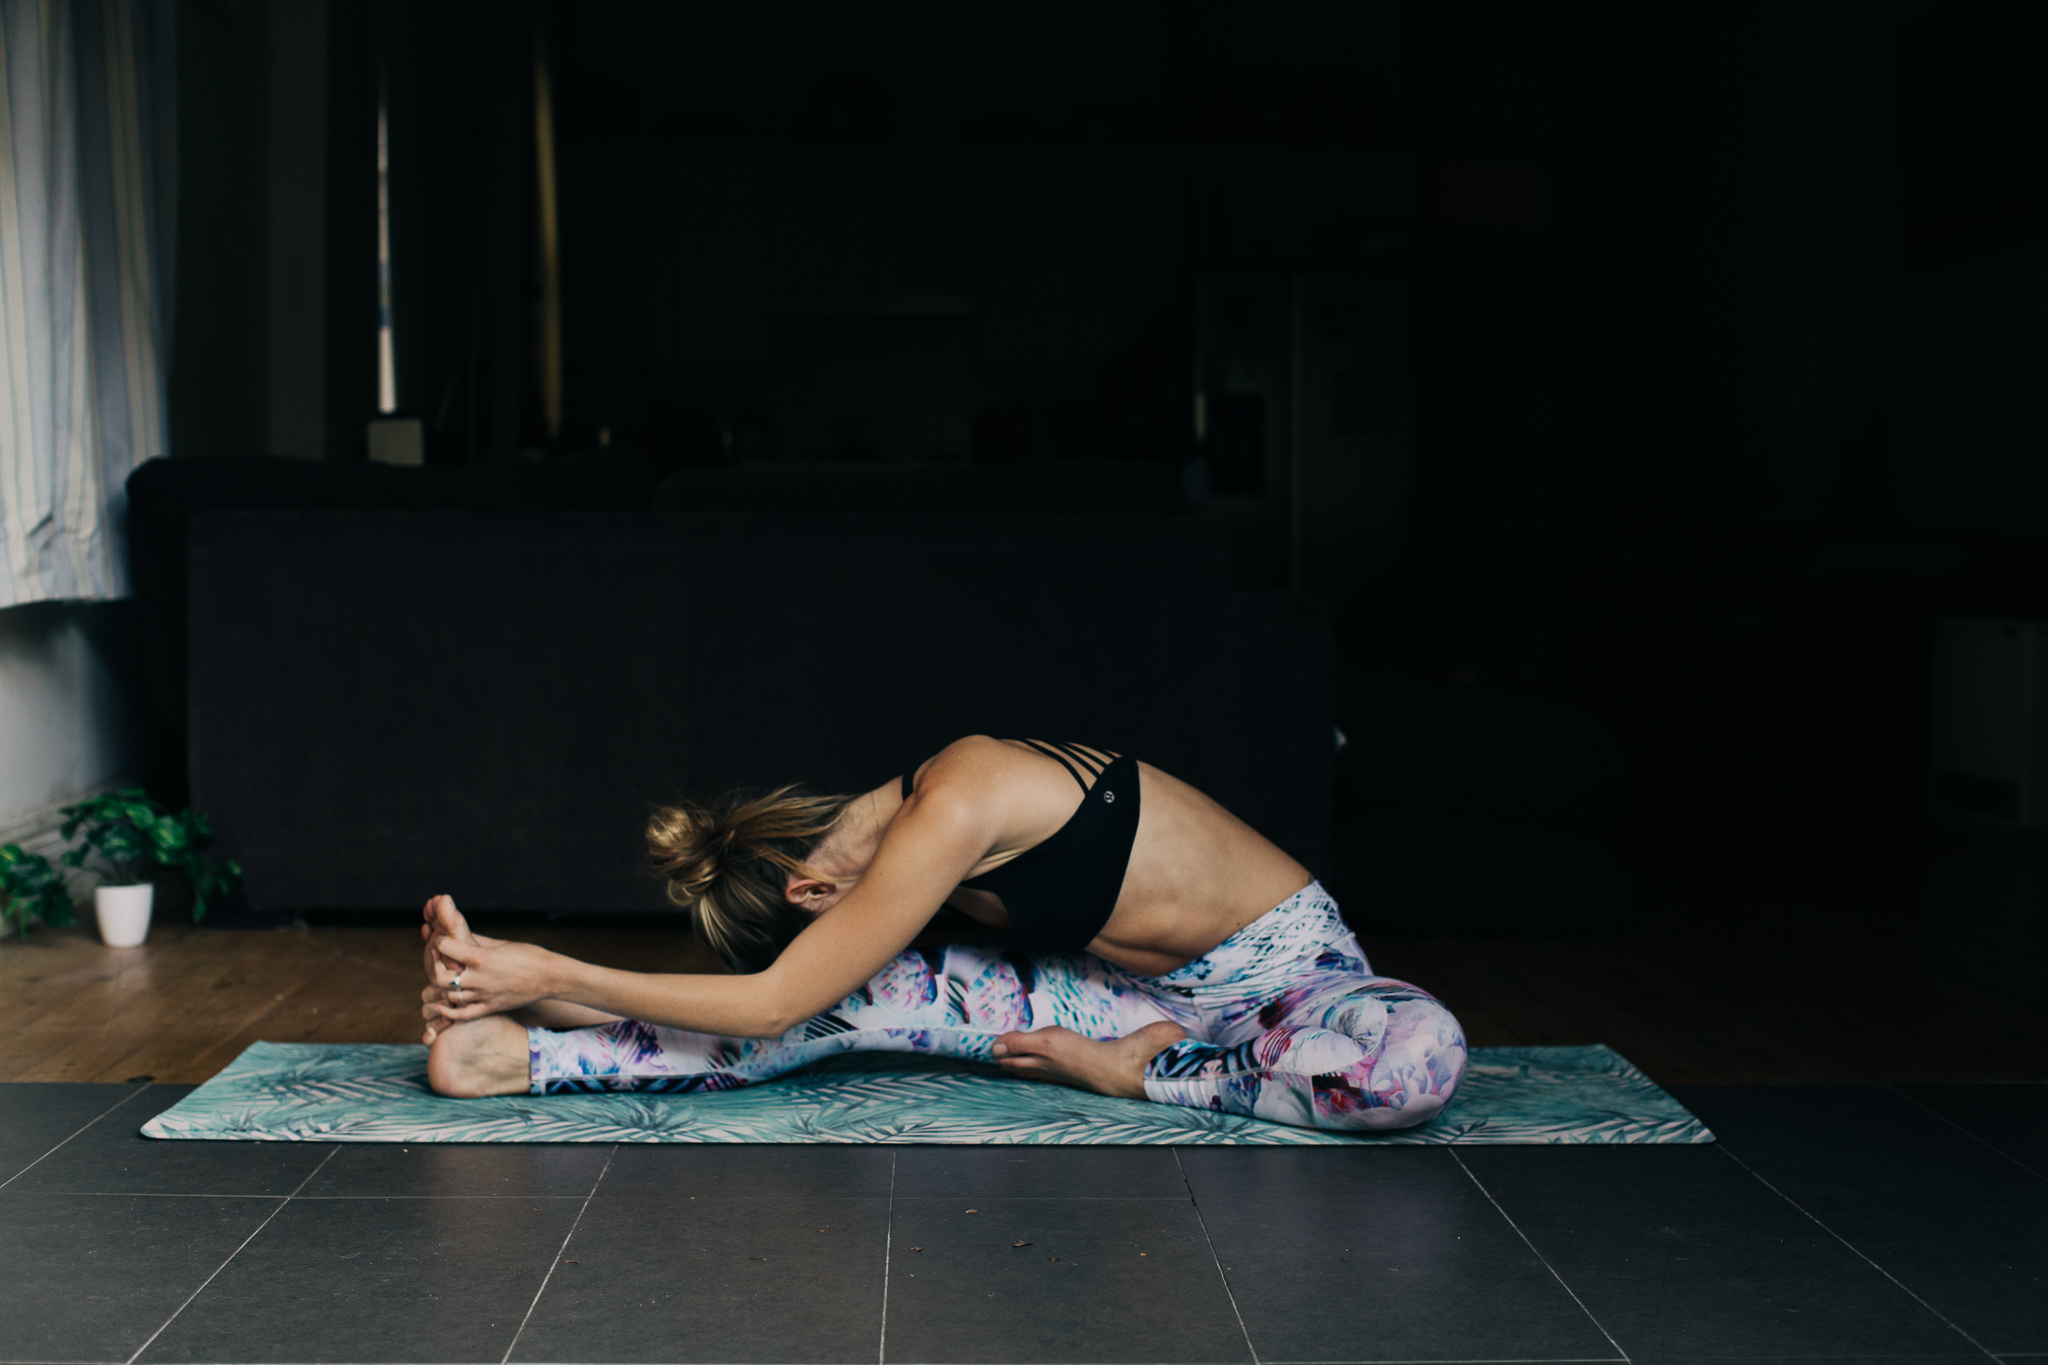
Allow me to introduce a posture known as Janu Sirsasana. It’s one of my all-time favourites. Why? Because not only is it accessible to everyone (including you), but this pose gets into your lower, deeper abdominal muscles, also known as the Quadratus Lomborum or “QL” (That’s anatomy 101, again). You’ll know it when you feel it, cause it feels oh-so-good. Like that sweet aaaaaaaahhhh you get when something is super tight without you knowing. It’s also a sneaky bonus hip stretch for your outer hips and glutes.
There are a couple variations to this pose, if done correctly, you’ll get to stretch different parts of your back. I’ll explain both variations.
Here’s how to get into Janu Sirsasana
Start seated, with your left leg bent, right leg straight. Your left foot pressing into your right thigh. (Think: Seated tree pose — refer to image below).
1st Variation (focuses on your hips): grab the outer edge of your right foot (the leg that’s extended). If you can’t reach your foot, try your ankle of shin. Remember, your tilted slightly towards your right side, so try and bring the awareness into grounding down through your left sitting bone. Keep your tush evenly on the ground.

If you can, bring your left arm over head. You’ll get a great opening in your left side body, all the way down to your hip.
2nd Variation (focuses on your lower back): Fold straight forward onto your right leg. This will stretch out aforementioned “QL” deep lower back muscles. If you have tight hamstrings and can’t fold very far, simply bend your right leg a little, squeeze your quad muscle on gently, this will relax your hamstring muscle.
Stay for 5-10 Breaths. Then switch sides.
There is a third variation to this posture, which isn’t pictured. Bring your left hand to the outside of your right foot. You’re in a gentle twist, think “left earlobe to the right knee” — you won’t really touch your knee with your earlobe but that’s the movement you want to be going for, you’ll fell like you’re getting into another area of your lower back.